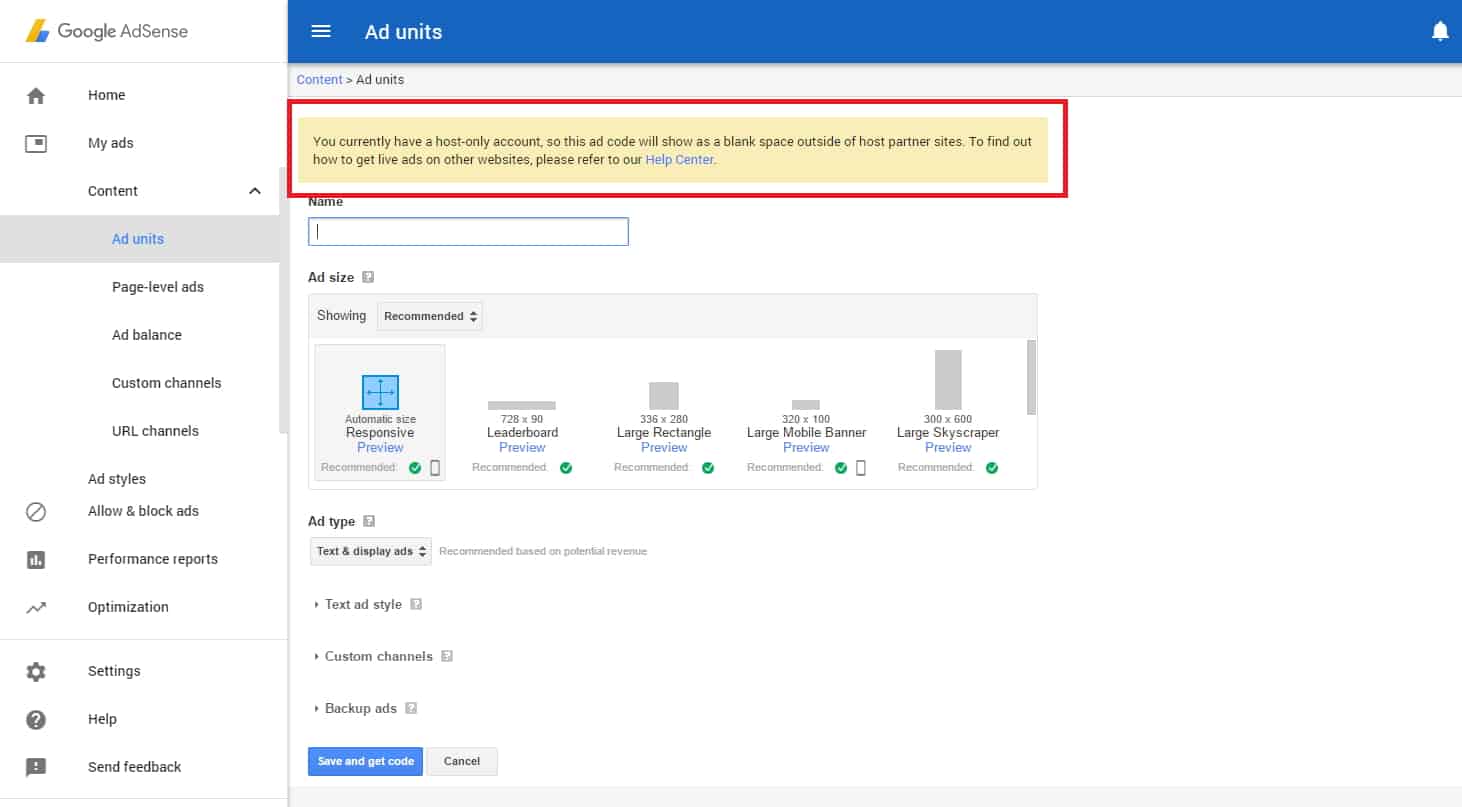
Host-only AdSense Account:
This is a Google AdSense account that can only put ads on Google’s host partner sites. For example, video sharing sites like Youtube and blog site like Blogger. In other words, if you want to put ads on other websites and blogs the account must be upgraded to non-hosted account. This is what host-only account looks like:

Notes:
- Make sure your blog or website have enough content before applying for AdSense non-hosted account.
- The content must original and not copied from other websites.
- Google AdSense have the right to disapprove the blog/website if requirements are not met. You can apply again just make sure to correct the requirements stated in the email sent by Google.
- I applied this blog to Google Adsense having 6 articles with 200-300+ words each, have pages of About Us, Privacy Policy, Disclosure Policy and Contact me. Check this link for other requirements as well.
Tutorial:
- Sign in to your AdSense account
- Click on “My ads” then “Other products”
- Type in your website or blog address
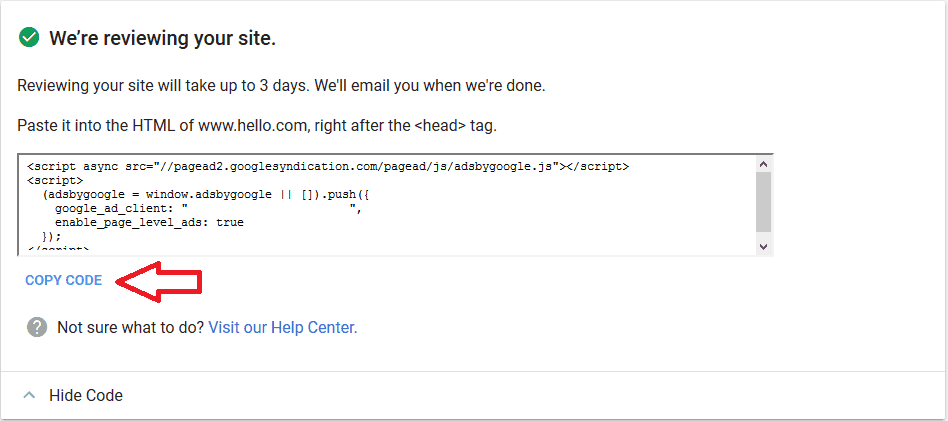
- Google AdSense will give a code to put in your website.
- Click “Copy Code” to copy all the codes in the box.
- If you’re using WordPress, install plugin called Insert Headers and Footer
- Search it on Plugins then Add New
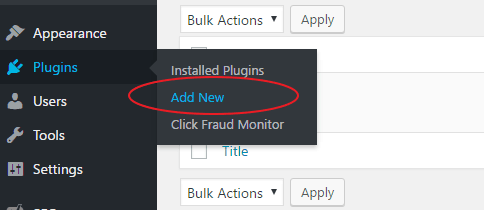
- Search Insert Headers and Footer in the search bar
- Install and activate the plugin
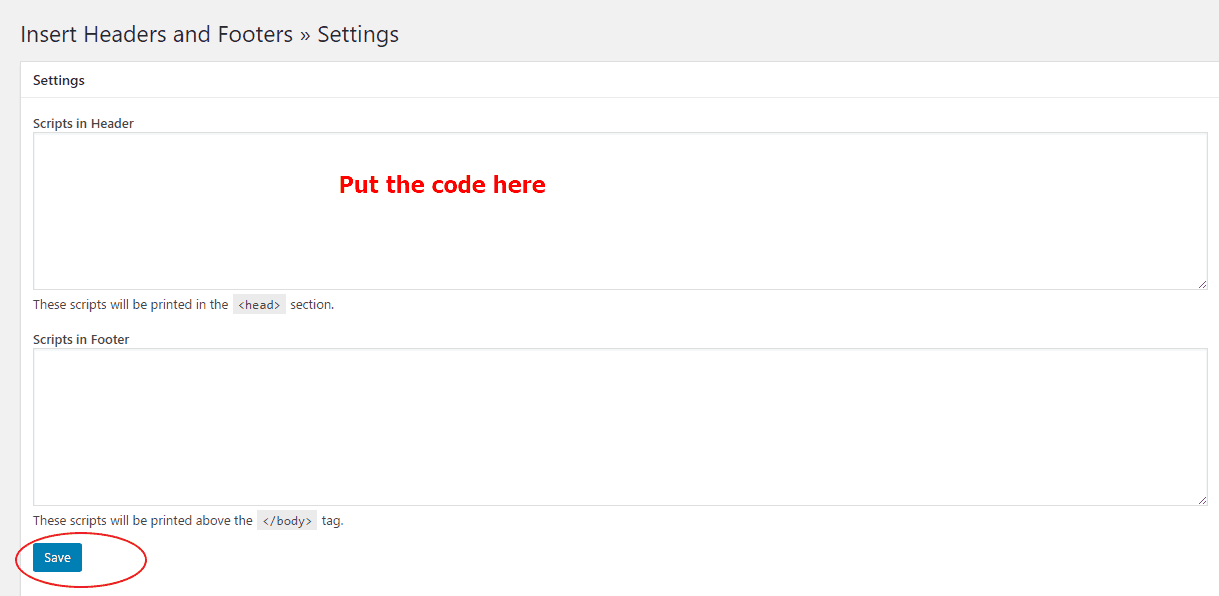
- Go to Settings then click Insert Headers and Footers Menu
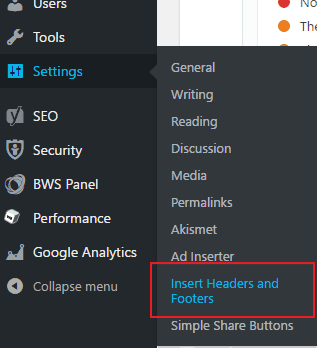
- Put the Google AdSense code on the “Scripts in Header” box the press save.
Reviewing the Site:
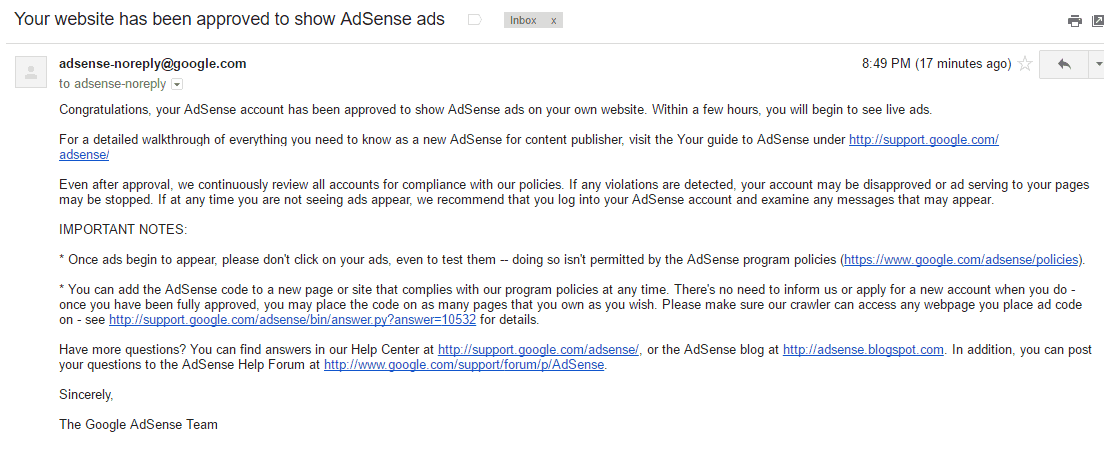
It may say the review can take up to 3 days but in my personal experience, it is different. As a matter of fact, they review my blog for 2 weeks. I applied on April 22, 2017, and got approved on May 4, 2017. Here’s a screenshot:
I hope this tutorial will help those applying for AdSense non-hosted account. Thank you and Godbless 😀



Be the first to comment